Tutorial for the Admin
Thank you for choosing Hyphenate Customer Engagement Cloud! Here's a simple tour to help you get started with the Customer Engagement Cloud.
Set Up Conversations
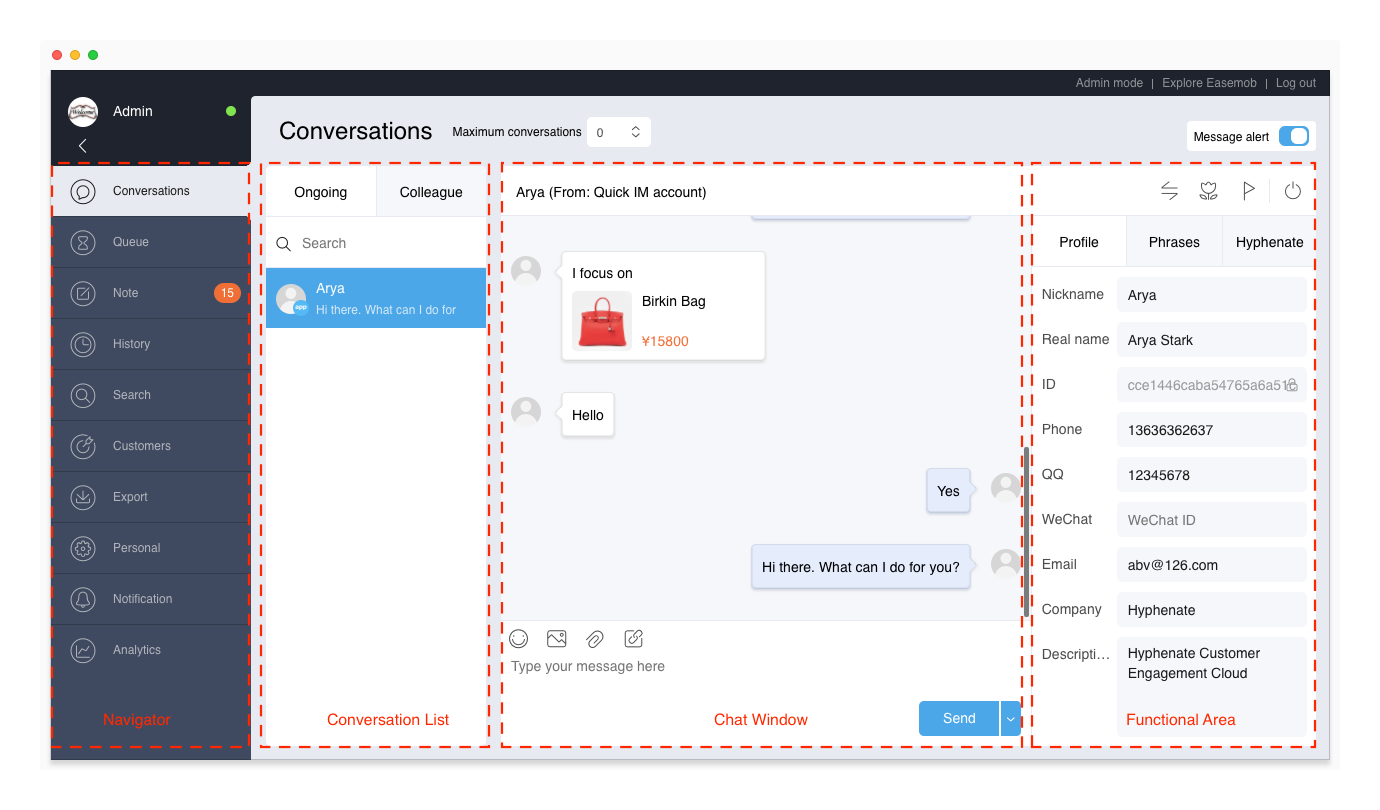
After you log in to Hyphenate Customer Engagement Cloud, the Agent Mode is displayed by default. You can have conversations with both customers and your colleagues on the Conversations page. When there is an ongoing conversation, more functions are displayed on the Conversations page (see below).
Conversation Process
A conversation is initiated either by a customer or by an agent. During the conversation, the agent can add a conversation tag to mark the type of the conversation. After answering the customer's inquiry, the agent can close the conversation and view its details on the History page.
| Button | Description |
|---|---|
| With the “Transfer” button, the agent can transfer the conversation to a colleague or team. | |
| With the “Satisfaction ratings” button, the agent can invite the customer to rate the conversation before closing it. | |
| With the “Conversation tags” button, the agent can mark the conversation. | |
| With the “Close conversation” button, the agent can close the conversation after answering the customer's inquiry. Closed conversations can be viewed on the History page. |
Set Phrases
A phrase is a commonly used message that the agent sends to the customer. Public phrases are set by the admin for use by all agents. Personal phrases are set by the agent only for personal use.
Set Public Phrases
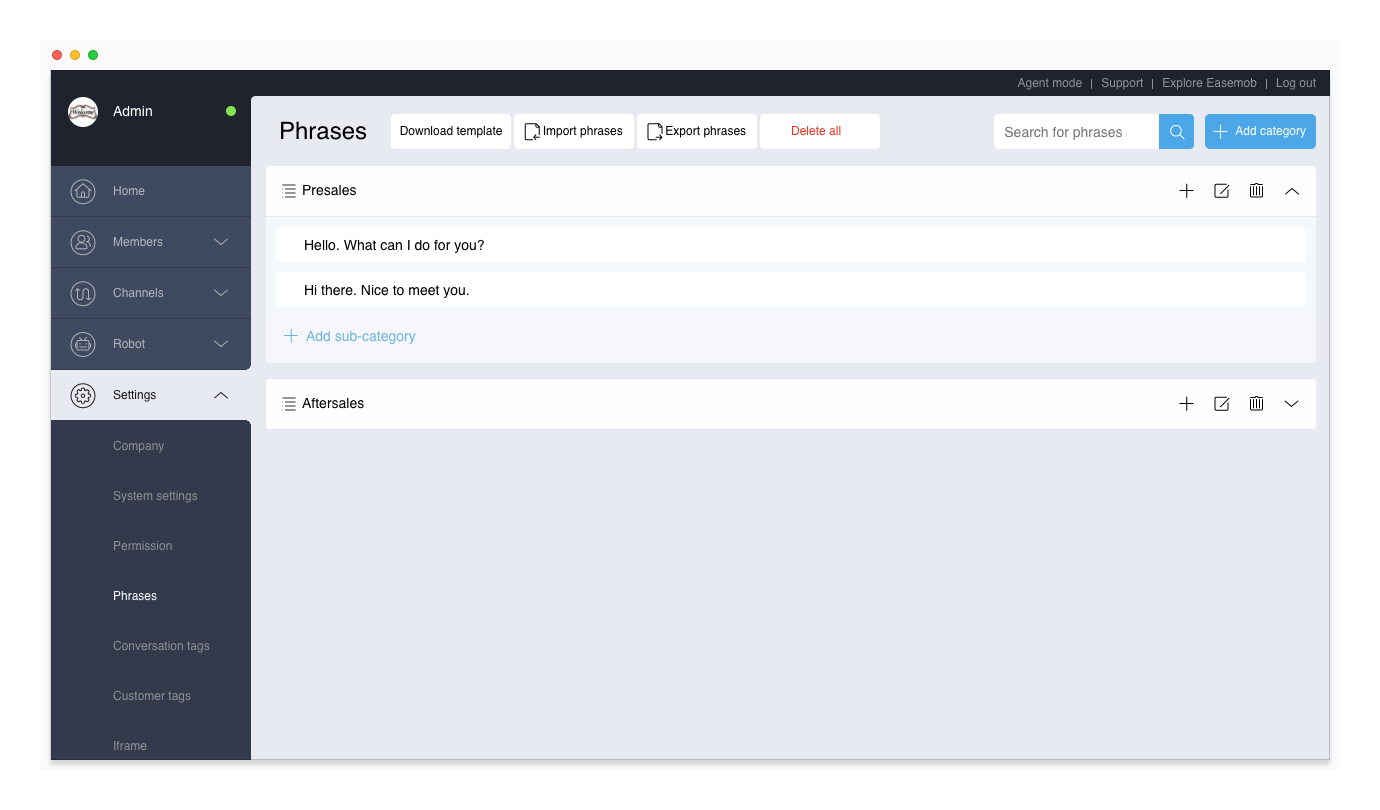
Go to “Admin Mode > Settings > Phrases” to set public phrases. You can add multiple level 1 categories, multiple level 2 categories, and multiple phrases in each category.
- To add a level 1 category, click Add Category in the upper right corner on the Phrases page.
- To add a level 2 category, click Add Sub-category within a level 1 category.
- To add a phrase to a level 1 category, click the plus sign (+) to the right of the level 1 category.
- To add a phrase to a level 2 category, click the plus sign (+) to the right of the level 2 category.
Public phrases are displayed on the Conversations page. Agents can use them but cannot edit them.
Set Personal Phrases
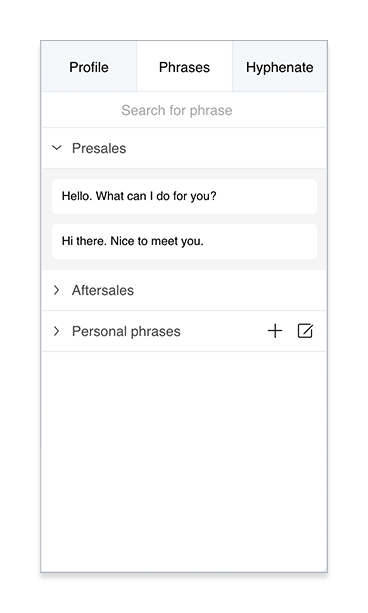
On the Conversations page, on the Phrases tab:
- Under the Personal Phrases menu, click Add Sub-category to add a level 2 category.
- Click the plus sign (+) to the right of “Personal Phrases” to add a phrase to the level 1 category.
- Click the plus sign (+) to the right of a level 2 category to add a phrase to the level 2 category.
Turn on Robot /Auto Reply
Hyphenate robot helps your team provide 24/7 online service and auto replies to your customers.
Before using the robot, you need to turn on the robot and create knowledge rules as the basis for the auto replies.
Turn On the Robot
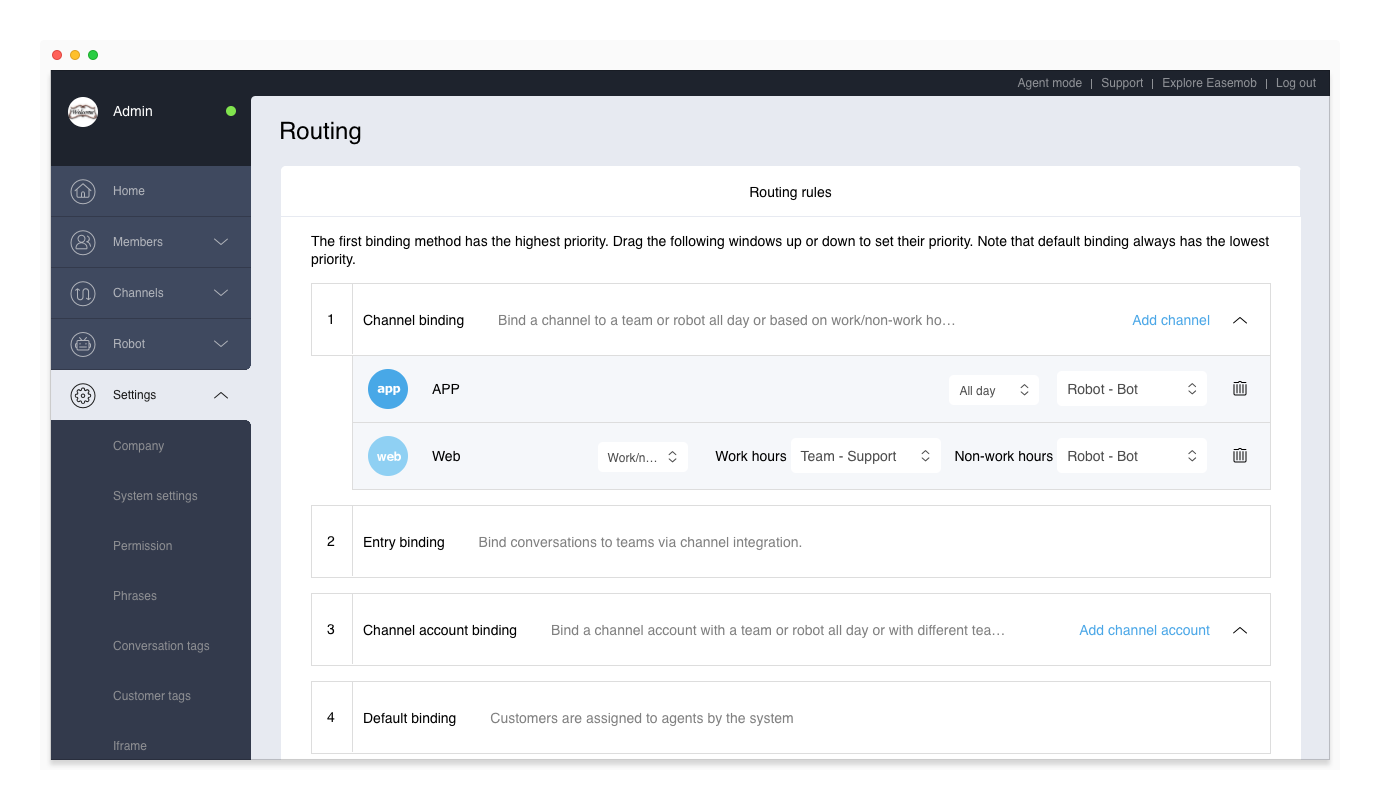
Go to “Admin Mode > Settings > Routing” and bind the robot to one or more channels or channel accounts. The robot will start working right away.
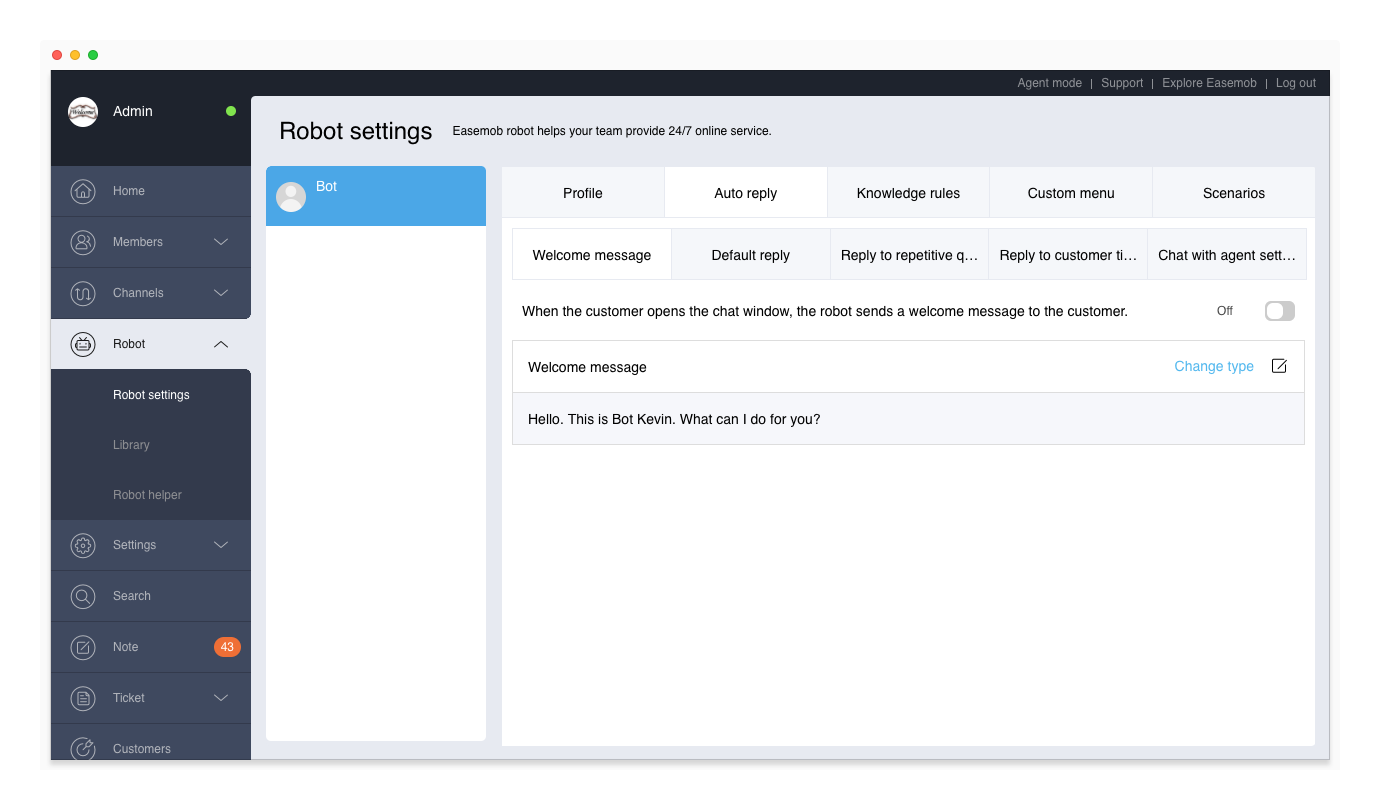
Set Welcome Message
The robot welcome message is turned off by default. If you turn on the robot and set the robot welcome message, when the customer opens the chat window (on app or web), he will receive the welcome message from the robot. (Note: An API must be called to display the welcome message on app.)
The welcome message can be text (up to 1000 characters) or a menu (created on the Custom Menu tab).
Use the Knowledge Base
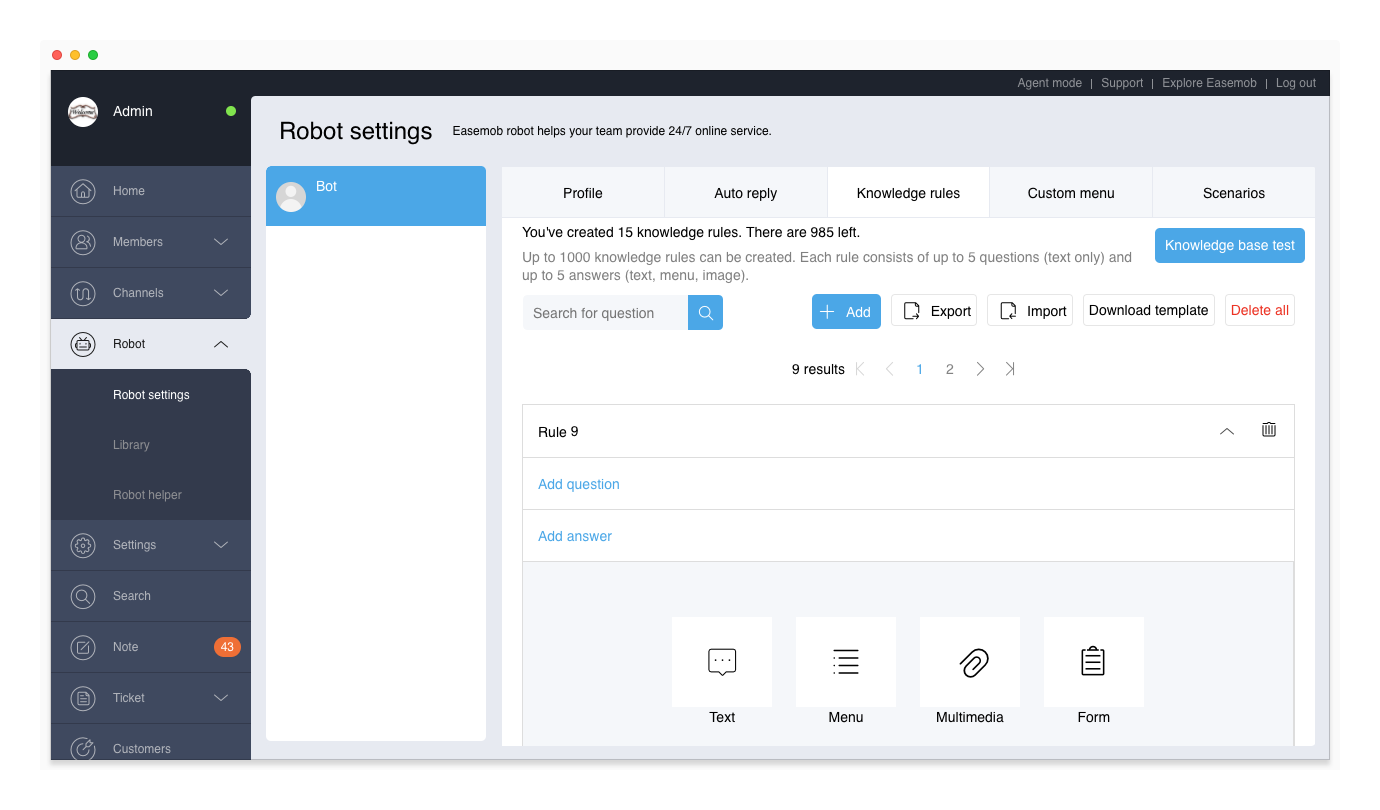
The robot's knowledge base consists of: a chat library and knowledge rules. The chat library is a built-in function of the robot, which is turned off by default, and can be turned on from the “Robot Settings > Auto Reply > Default Reply” tab. Setting up knowledge rules can effectively improve the robot's capability to solve service problems. A knowledge rule contains one or more questions and answers (go to “Admin Mode > Robot > Robot Settings > Knowledge Rules” to add knowledge rules). When a customer sends a message that meets a preset knowledge rule, the robot will automatically reply with an answer in the knowledge rule.
In the knowledge base, you can enter up to 1000 knowledge rules. In each knowledge rule, you can add 5 questions and 5 answers. When the robot matches any question, it will reply with one of the 5 answers.
Add Custom Menu
The robot's custom menu is a good way to guide the user's question and answer, suitable for self-service system. The custom menu can be used in the welcome message, default reply, and knowledge rules.
Go to “Admin Mode > Robot > Robot Settings > Custom Menu”, click Add Menu, enter the menu name, and click Save to add a set of menus. Each menu supports up to 4 levels (not including answers) and up to 20 menu items per level. Each menu item is counted as a knowledge rule.
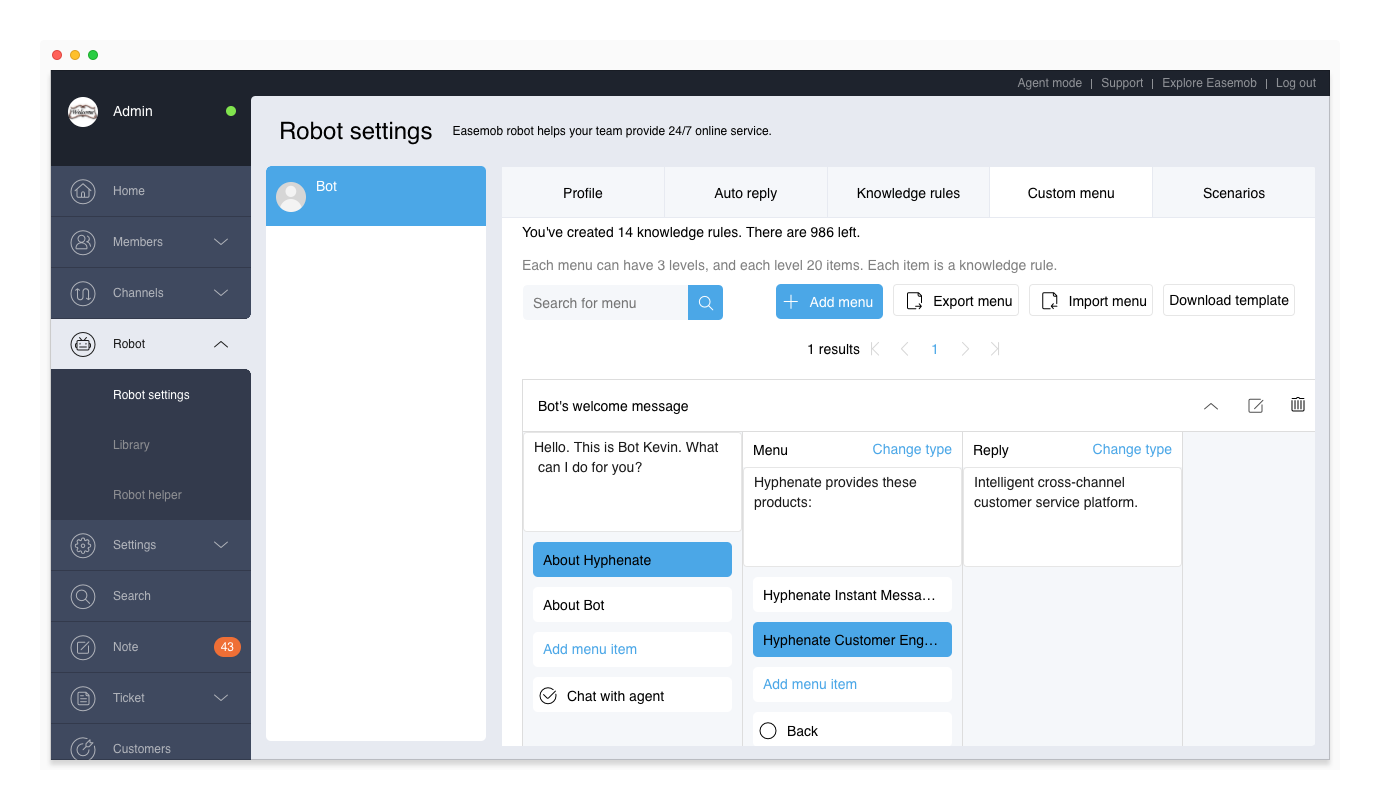
Each menu name and menu item name is a question, which is the same as the question in a knowledge rule. When the customer enters a menu name or a menu item name, the robot will reply with the menu items directly.