Create IM Account
The “IM account” on the Hyphenate Customer Engagement Cloud corresponds to the application in the instant messaging (IM) console. After creating an IM account on the Hyphenate Customer Engagement Cloud, you can log in to the IM console to manage the corresponding application.
Quick Create
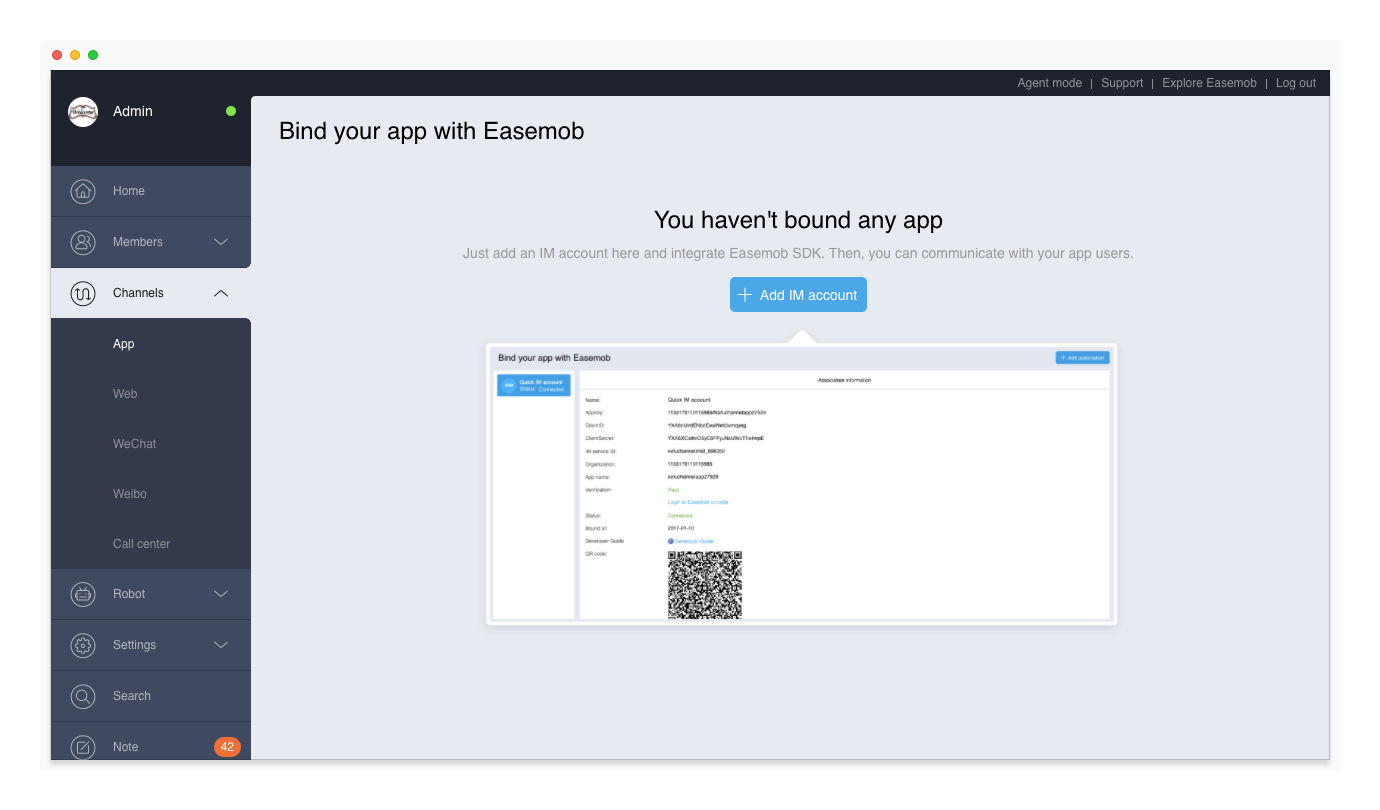
1. Log in to Hyphenate Customer Engagement Cloud, and go to “Admin Mode > Channels > App”.

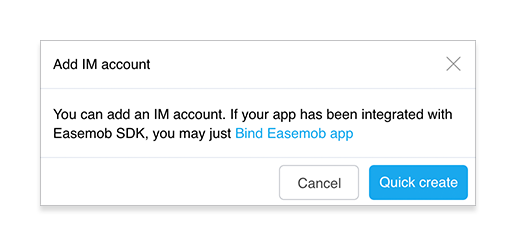
2. Click Add IM Account to create an IM account. There are two ways: Quick create, and Bind IM account.
- Quick create: If you do not have an IM console account, you can click Quick create. The system will automatically create an IM account for you.
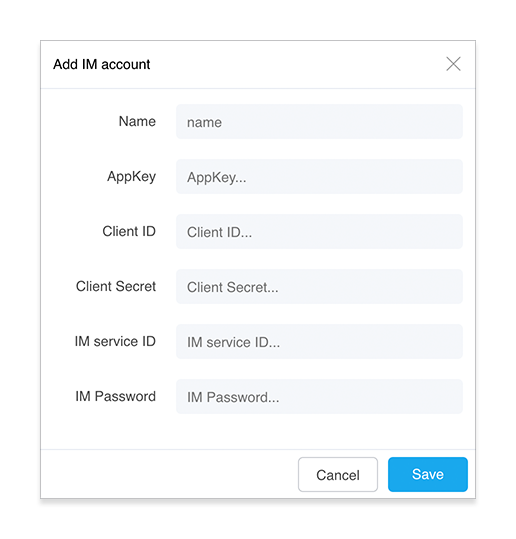
- Bind IM account: If you already have an IM console account and have created an application on the IM console, you can click Bind IM Account and fill in the display name, AppKey, ClientId, ClientSecret, IM service ID (IM username), IM password (IM user's password) to manually bind your application to Hyphenate Customer Engagement Cloud.

3. Click Quick Create. The system will automatically create an IM account for you.
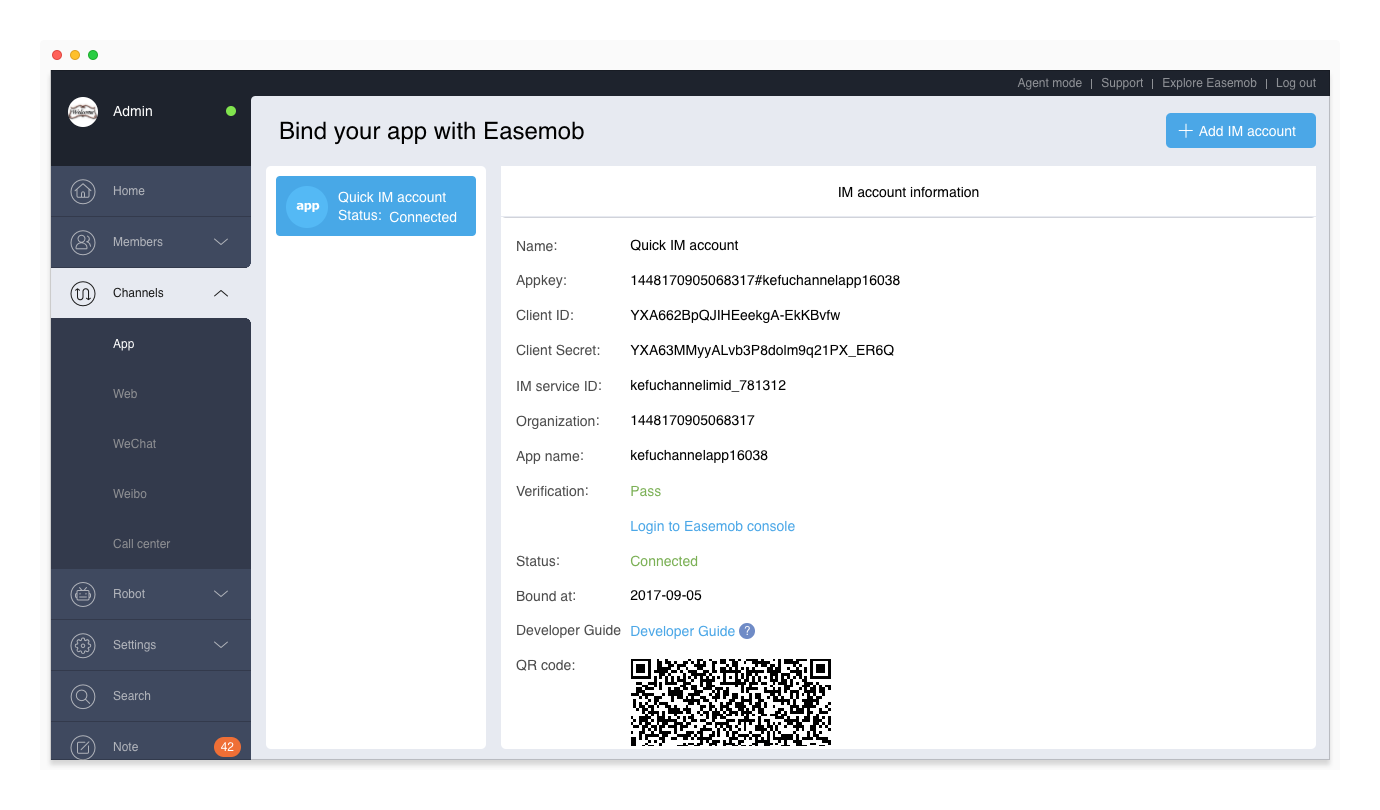
After you create an IM account, you can view the account information, including the display name, AppKey, IM service ID, etc. For an IM account created in the Quick Create mode, you can also click “Login to IM console” to view more information.
- Name: display name of the IM account on the Hyphenate Customer Engagement Cloud. The name can be modified.
- AppKey: uniquely identifies the application. AppKey and “IM service ID” constitute a message channel between the mobile App and the Hyphenate Customer Engagement Cloud. AppKey cannot be modified.
- ClientId and ClientSecret: automatically generated. They are used to obtain administrator token in the IM system and cannot be modified. The administrator token is used in server integration for Hyphenate instant messaging cloud.
- IM service ID: username of any IM user in the application identified by the AppKey. AppKey and “IM service ID” constitute a message channel between the mobile App and the Hyphenate Customer Engagement Cloud. IM service ID and its password can be modified.

Note:
Since August 8, 2017, IM accounts created using the Quick Create button are located on the Hyphenate vip5 server cluster. When you perform User Integration, please change the domain name in the examples to https://a1-vip5.easemob.com.
For applications created on Hyphenate console, when you perform User Integration, just follow the examples.
Bind IM Account
1. Log in to Hyphenate Customer Engagement Cloud, Go to “Admin Mode > Channels > App”.

2. Click Add IM Account to create an IM account. There are two ways: Quick create, and Bind IM account.
- Quick create: If you do not have an IM console account, you can click Quick create. The system will automatically create an IM account for you.
- Bind IM account: If you already have an IM console account and have created an application on the IM console, you can click Bind IM Account and fill in the display name, AppKey, ClientId, ClientSecret, IM service ID (IM username), IM password (IM user's password) to manually bind your application to Hyphenate Customer Engagement Cloud.

3. Click Bind IM Account, enter these information (shown in the following figure), and click Add.
Note: Enter the username (lower case) of an IM user in the IM service ID box.

After you bind an IM account, you can view the account information, including the display name, AppKey, IM service ID, etc.
